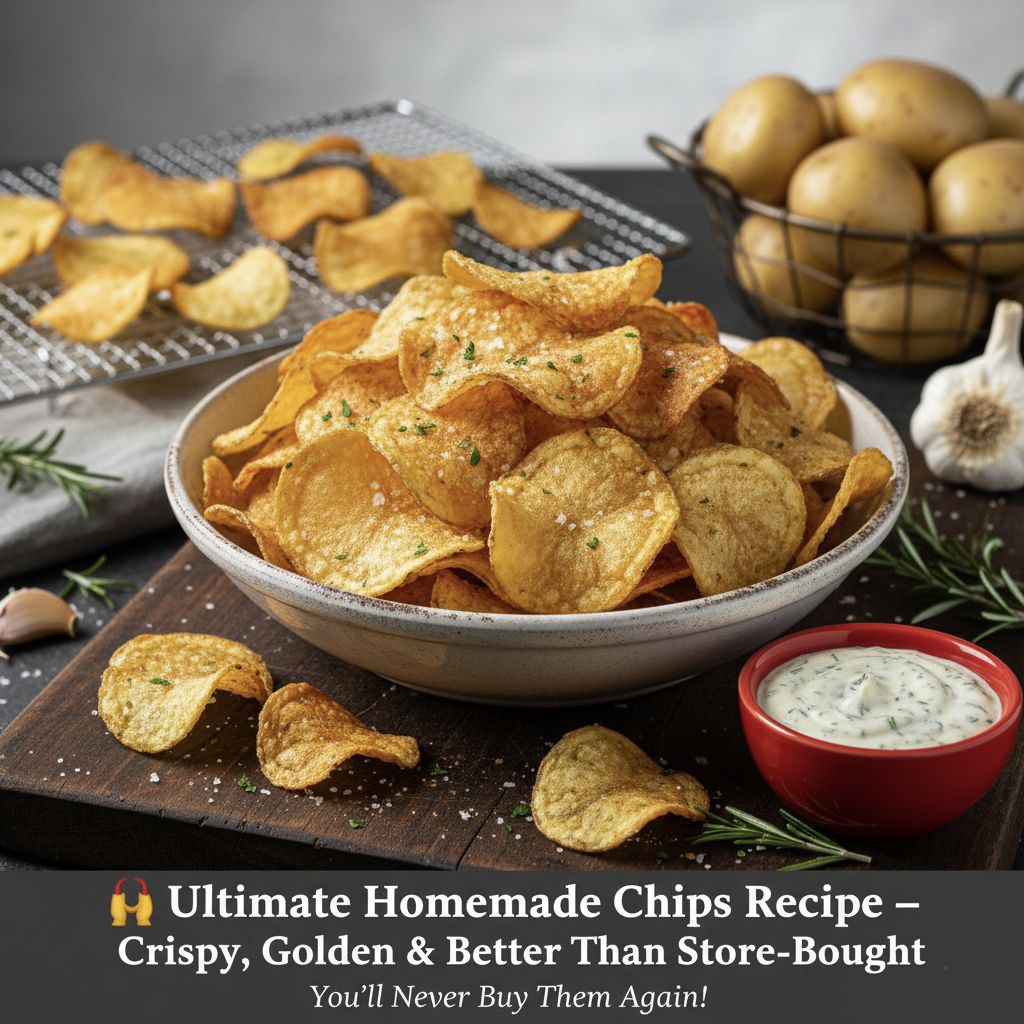
⭐ Introduction: The Magic of Homemade Chips
There’s something incredibly satisfying about biting into a chip that’s perfectly crispy, beautifully golden, lightly salted, and still warm from the pan. While store-bought chips are convenient, homemade chips deliver a taste and crunch that packaged snacks simply can’t match.
Whether you want a quick snack, a party side, lunchbox ideas, or something delicious for movie night—homemade chips never disappoint. They’re:
✔ Fresher
✔ Crunchier
✔ Customizable
✔ Made with real ingredients
✔ Free from preservatives
If you’ve ever wondered how restaurants make such crispy potato chips—or how to achieve that perfect crunch at home—this guide will show you everything you need to know.
🥔 Why Make Chips at Home?
Homemade chips offer several advantages:
✔ Total control over ingredients
Choose your oil, your potatoes, your seasonings—your way.
✔ No preservatives
Only potatoes, oil, and seasoning.
✔ Healthier than packaged chips
Fry in clean oil and avoid excessive additives.
✔ Affordable
One potato = 2–3 servings of fresh chips.
✔ Endless flavors
From classic salted to spicy, cheesy, herby, smoky, and more.
🛒 Ingredients You Need
You only need 3 basic ingredients:
⭐ Essential Ingredients
- 3–4 medium potatoes (Russet or Yukon Gold recommended)
- Oil for frying (canola, vegetable, peanut, or sunflower oil)
- Salt to taste
⭐ Optional Seasonings
- Paprika
- Garlic powder
- Onion powder
- Chili powder
- Black pepper
- Ranch seasoning
- Cajun seasoning
- Cheese powder
- Lemon pepper
- Peri peri seasoning
- Chaat masala
- BBQ seasoning
⭐ Optional Extras
- Vinegar (for salt & vinegar chips)
- Fresh herbs
- Parmesan cheese
- Dried herbs
🔪 STEP-BY-STEP: How to Make Perfect Homemade Chips
🥔 STEP 1 — Choose the Right Potatoes
The best chips come from starchy potatoes like:
- Russet potatoes
- Yukon Gold
They fry better and produce a crispier texture.
Avoid waxy potatoes—they become soft rather than crispy.
🔪 STEP 2 — Wash & Peel (Optional)
You can peel the potatoes or leave the skin on for rustic-style chips.
✔ Wash thoroughly
✔ Remove dirt
✔ Cut off imperfections
🔪 STEP 3 — Slice the Potatoes Thinly
Crispy chips depend on thin, even slices.
Use:
- A mandoline slicer (best!)
- A sharp knife
- Food processor slicing attachment
Thickness goal:
👉 1.2 – 1.5 mm slices
Thinner = crispier
Thicker = softer, more potato flavor
💧 STEP 4 — Soak the Potato Slices
Place the slices in a bowl of cold water for at least 20–30 minutes.
This removes extra starch and prevents chips from turning brown.
Why soak?
- Makes chips crispier
- Prevents sticking
- Prevents sogginess
- Helps maintain color
💦 STEP 5 — Rinse & Dry Properly
After soaking, rinse the potatoes 2–3 times until the water runs clear.
Spread slices on a towel.
Pat completely dry.
✔ Chips MUST be dry before frying to avoid sogginess and oil splattering.
🍳 STEP 6 — Heat the Oil
In a large pan or deep fryer:
Heat oil to 325–350°F (160–175°C).
Use a kitchen thermometer if available.
If not:
Drop in one potato slice — if it bubbles gently, the oil is ready.
🍟 STEP 7 — Fry the Chips (First Fry)
Add a handful of slices at a time.
Don’t overcrowd.
Fry for 2–3 minutes until slightly tender but NOT brown.
Remove and drain on paper towels.
🔥 STEP 8 — Second Fry for Crispiness
Increase heat to 375°F (190°C).
Add chips back to the hot oil.
Fry until:
✔ Light golden
✔ Crispy
✔ Surface blistering slightly
This step gives the iconic crunch.
🧂 STEP 9 — Season Immediately
While chips are still hot:
Sprinkle with salt or your chosen seasoning.
Seasoning sticks better when chips are warm.
🌡️ STEP 10 — Cool & Serve
Let chips cool for 2–5 minutes.
They will crisp even more as they cool.
Serve warm or store once completely cooled.
🌈 Seasoning Ideas — 20 Flavors to Try
⭐ Classic
- Salt only
- Salt & pepper
- Salt & garlic
🔥 Spicy
- Chili powder
- Peri peri
- Cajun seasoning
- Hot paprika
🧀 Cheesy
- Parmesan + garlic
- Cheddar cheese powder
- Ranch seasoning
🍋 Tangy
- Lemon pepper
- Salt & vinegar (see below)
- Chaat masala
🍖 BBQ Style
- Smoked paprika
- Brown sugar
- Onion powder
🌿 Herby
- Rosemary
- Dill
- Basil + oregano
⭐ Salt & Vinegar Chips
Before frying:
Soak slices in 1 cup vinegar + 2 cups water for 30 minutes.
Salt after frying.
🧠 Pro Tips for Crispy Chips Every Time
✔ Use starchy potatoes
✔ Slice thin and even
✔ Soak + rinse to remove excess starch
✔ Dry thoroughly
✔ Fry twice
✔ Don’t overcrowd
✔ Keep oil temperature steady
✔ Season when hot
These steps guarantee perfect crunch.
❌ Common Mistakes to Avoid
| Mistake | Result | Fix |
|---|---|---|
| Slicing too thick | Chewy chips | Use mandoline |
| Not soaking | Soggy, soft chips | Soak 30 minutes |
| Wet potatoes | Oil splatter | Dry with towel |
| Overcrowding | Uneven frying | Cook in batches |
| Too low oil temp | Greasy chips | Maintain 350–375°F |
| Using wrong potatoes | Soft chips | Use Russet/Yukon |
🥡 Storage Guide
✔ Room Temperature
Store chips in airtight container for 3–4 days.
Add a few grains of dry rice to absorb moisture.
✔ Do NOT refrigerate
Fridge makes chips soggy.
✔ Freezing?
Not recommended. Chips lose texture.
🍽️ What to Serve Homemade Chips With
Homemade chips go well with:
- Burgers
- Sandwiches
- Wraps
- BBQ
- Grilled chicken
- Pizza
- Fried chicken
- Party trays
Or enjoy plain as a snack!
🧮 Nutrition Overview (Approx. per serving)
- 150–200 calories
- Healthy carbs
- No preservatives
- Sodium based on seasoning
- Healthier oil options available
🏁 Conclusion: The Perfect Homemade Chips Every Time
Making homemade chips is far easier than most people think—and the results are unbelievably delicious. Crispy, golden, fresh, and customizable, these chips taste far better than anything from a bag.
Whether you’re preparing snacks for family movie night or making party appetizers, this homemade chips recipe is guaranteed to impress.
Once you try them, you’ll never want to buy store-bought again.